Project development entry
Project Development Entry
1. Our team Chemical Device
In this section, you will briefly describe your team chemical device.
What it is. What problems will the chemical device solve? And provide a hand sketch of the chemical device.
Our chemical device is a door handle sanitizer. It aims to reduce the problem of high infection rates of Covid-19 through indirect contact by an infected person. This can be through everyday objects that have been contaminated such as the door handle. Its function is to detect the hand on the door handle and spray hand sanitizer onto the door handle after a person lets go of the door handle. By doing so, it kills any bacteria or viruses on the door handle which in turns reduces the risk and reduces the rate of Covid-19 infections through indirect contact.
2. Team Planning, allocation, and execution
In this section, list down your team member's name.
Wei Xue (Team leader)
Firmanshah (Chief Financial Officer)
Anthony (Chief Operating Officer)
Lionel (Chief Security Officer)
Rufus (Chief Financial Officer)
Show the finalized BOM (BILL OF MATERIALS) table.
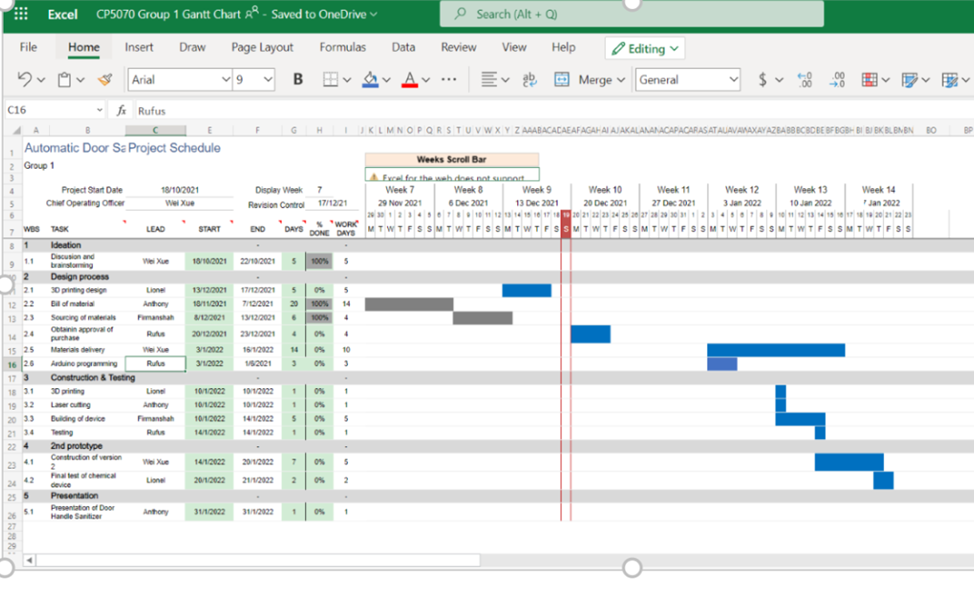
Project Title:
Automated Door sanitiser
Team members:
Anthony, Wei Xue, Firmanshah, Rufus, Lionel
Created by:
Anthony, Wei Xue, Firmanshah, Rufus, Lionel
Date created:
16/12/2021
BILL OF MATERIALS (BOM)
No
Description of item
Supplier
(Include hyperlink to the item in website of seller)quantity
quantity unit
unit price
Total Cost
Available at W319 Lab or FabLab? (Y/N)
1
Infrared sensor Module
1
-
$0.68
$0.68
N
2
Maker UNO Edu Kit
https://robot-r-us.com.sg/p/maker-uno-edu-kit-arduino-compatible
1
-
$18.70
$18.70
Y
4
Clear Acrylic Sheet | A3 Size (297mm x 420mm x 3mm)
1
374.22 cm3
$7.90
$7.90
Y
5
Spray Bottle
1
150ml
$0.64
$0.64
N
6
Acrylic Glue
https://artfriendonline.com/OnlineUsers/Product/PAP_PAD/PAINTING/ACRYLIC
1
50ml
$3.85
$3.85
N
7
Acrylic Hinges
https://artfriendonline.com/OnlineUsers/Product/PAP_PAD/PAINTING/ACRYLIC
1
-
$3.90
$3.90
N
Grand Total Cost:
$35.67
Planned:
Actual:
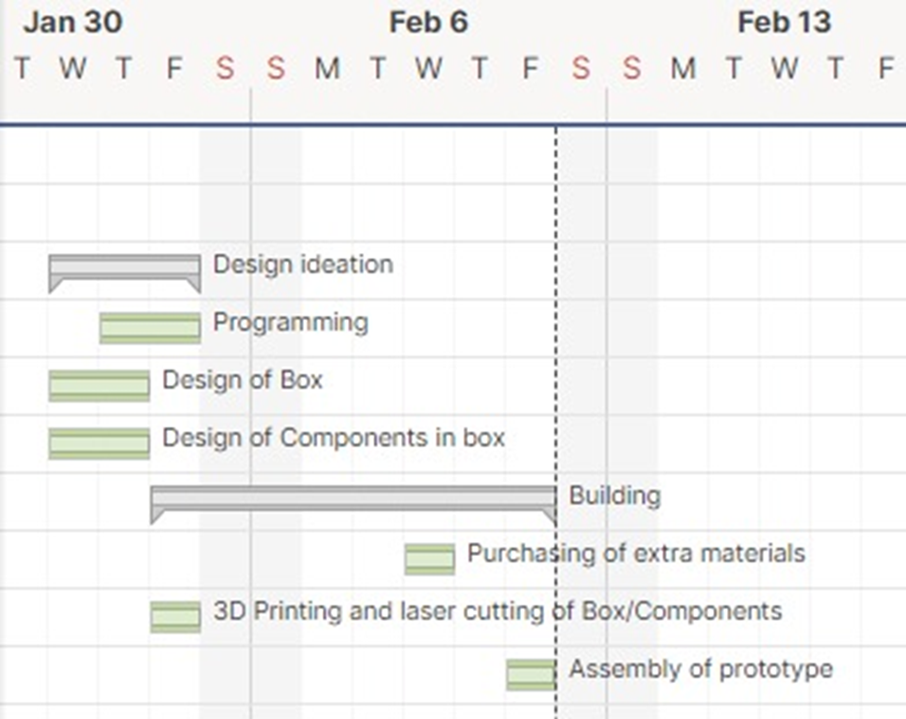
Programming and Setup of Arduino Circuit: Wei Xue and Lionel
Design of Box: Anthony
Design of Components in box: Everyone
3D Printing and Laser Cutting of Box and Components: Firman, Rufus
3. Design and Build Process
In this section, provide documentation of the design and build process.
Part 1. Design and Build of Part A ( firmanshah). Firman's Blog Part 2. Design and Building of spray holder v2 (Rufus)
Documentation for task 2.
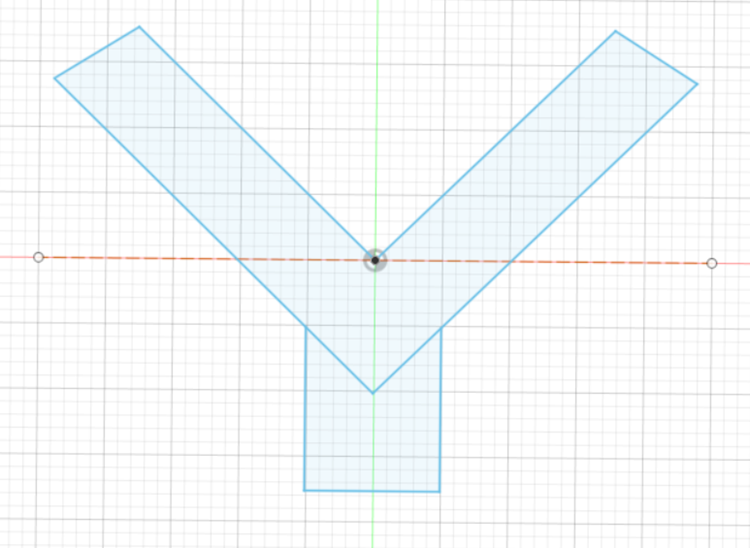
I was responsible for building and designing another spray bottle holder as seen below.
This is how we designed the bottle holder.
Firstly, I made the layout of how the holder would look like using Fusion 360
Next, I extruded the layout of the holder using the extrude function.Hero shot for task 2.
Here is my hero shot of my bottle holder.
Part 3. Design and Build of the Arduino holder and box ( Anthony).
Part 4. Coding of Arduino and Circuit Setup (Wei Xue+ lionel). Wei Xue's Blog Lionel's Blog
Part 5: Assembling the Prototype (Everyone) Lionel's Blog Anthony's Blog Wei Xue's Blog Firmanshah's Blog
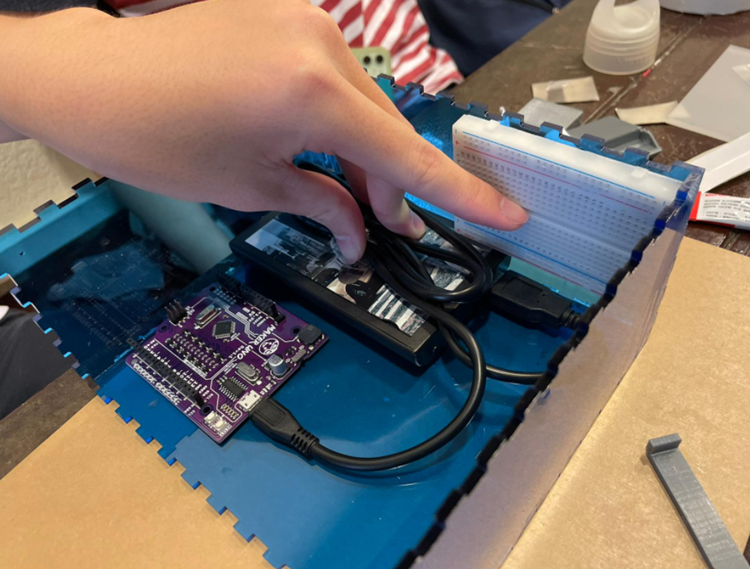
During our assembly of prototype, it was a group effort conducted by all. On 11th February, we met up in school to build our device.
So this is our planning stage where we determined where each part would be in the device.
Next, we assembled the acrylic casing using acrylic glue.
After gluing the acrylic case together, we started to assemble the interior pieces of the device using super glue and double-sided tape.
Next, we attached the acrylic hinge onto the casing so that we can open and close our device.
Afterwards, we attached our wires, Servo motor and infrared sensor into the case.
Lastly after the glue is dried, we place our spray bottle in and tested our device.
Live Demo:
4. Problems and solutions
In this section describe the problems encountered in the design and build process and how the team solved them.
Problem 1: When we were using our first bottle holder design, we realized that if we were to put the bottle into the holder and secure it into the container, we realized that we were not able to remove the bottle from the side.
Solution: Our solution was to cut the bottle holder that Firman made into a semi-circle to allow users to replace the spray bottle as and when it was empty. This would allow us to replace the bottle from the top instead of the sides.
Problem 2: Servo motor was not strong enough to push down the spray bottle.
Solution: We decided to cut the spring inside the spray bottle to lower the spray bottle resistance. Another solution we did was to increase the range of the servo motor from 40-80 degrees to 30-120 degrees to give it more power to press down the spray bottle.
5. Project Design Files as downloadable files
In this section, provide all the design files (Fusion360 files, .dxf files, .stl files, Arduino programs files) as downloadable files. You upload these files in OneDrive or google drive of your personal account. Each person must have these files. Always check that the links to download the files are working.
Link to edit:
https://drive.google.com/drive/folders/1IoNjm2DpI6_LEMhrlyfs-UZPBVXQFM2x?usp=sharing


Comments
Post a Comment